Flare-on challenge 11
Please read the disclaimer
We captured some malware traffic, and the malware we think was responsible.
You know the drill, if you reverse engineer and decode everything
appropriately you will reveal a hidden message.
This challenge thinks its the 9th but it turned out too hard,
so we made it the 11th.
Note: I’m sorry the writeup is a bit messy, I couldn’t find the time to write it properly, if you have any question please contact me, have fun :D I will update it whenever I find some free time.
Overview
The goal of this challenge is to analyze a malware and a given network packet capture (pcap) that contains the communication of the malware with a C&C server.
Analyzing the pcap part and the malware
We can see that there are 4 important tcp streams and many dns queries for TXT record, let’s see that in depth:
UDP QUERIES:

We can see that the malware query TXT record of different subdomains starting from aaa.asdflkjsadf.notatallsuspicio.us then aab.asdflkjsadf.notatallsuspicio.us etc…
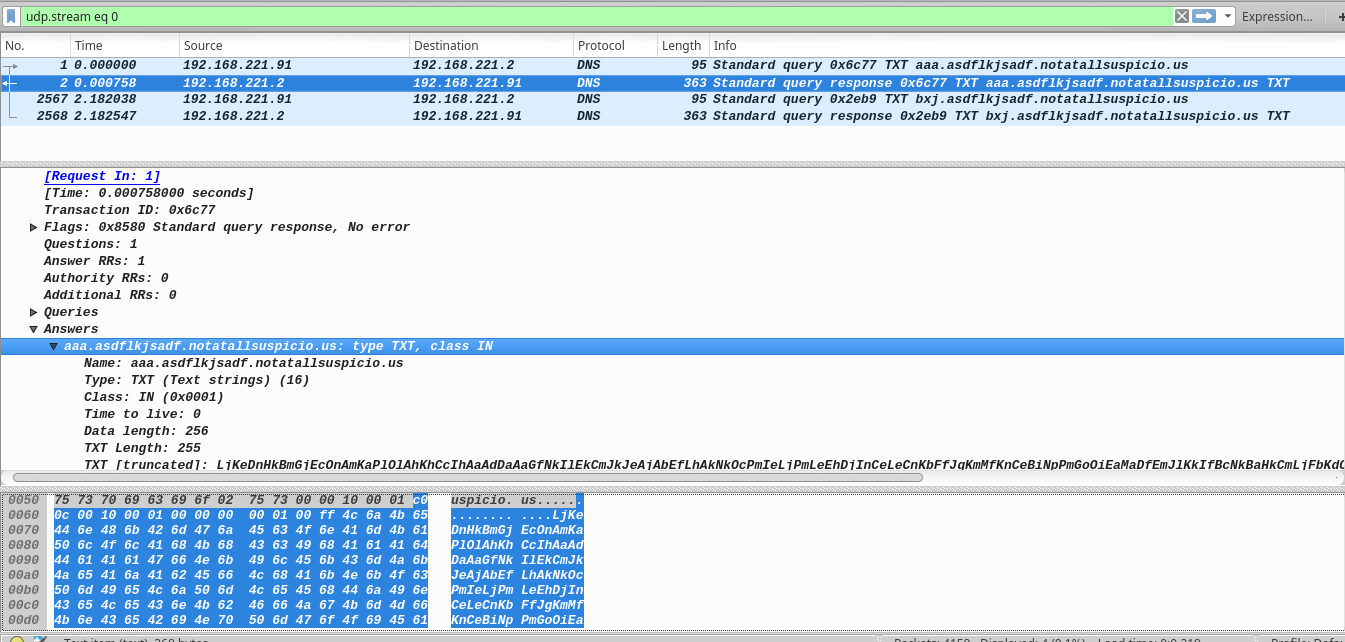
the query response contains a base64 encoded data.
TCP STREAMS:
tcp stream 0:
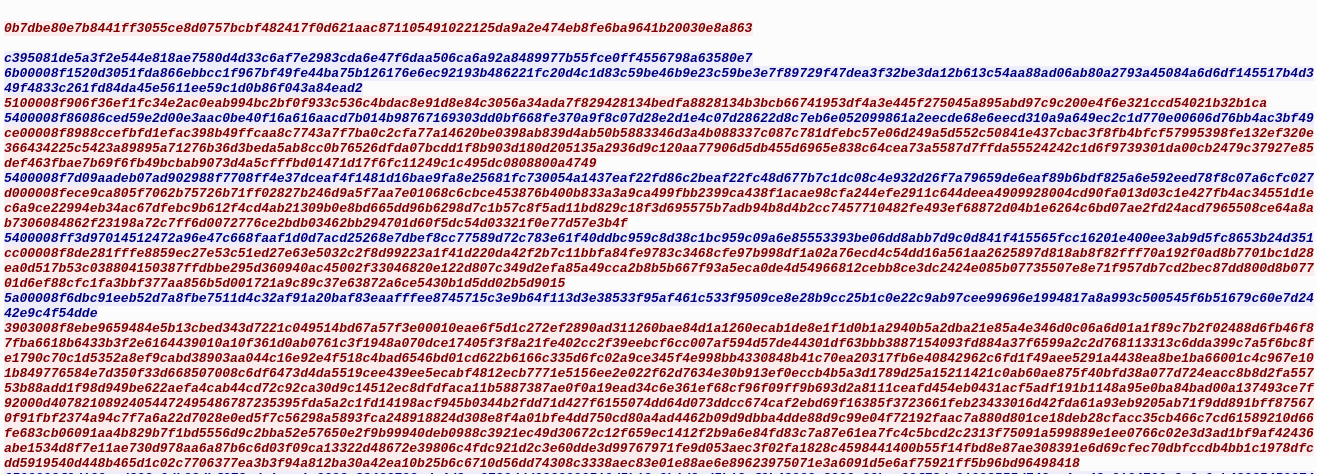
Contains some encrypted data of different size, but we notice that the first 2 exchanged packets are of the same size: 0x30 which might be a key exchange between the two entities.
the next picture shows the first 0x30 data sent from the malware to the C&C

tcp stream 2:
Contains some SMBv2 encrypted data too, we can also notice that the first 2 packets have a data of size 0x30
tcp stream 5
Contains some ftp communcation

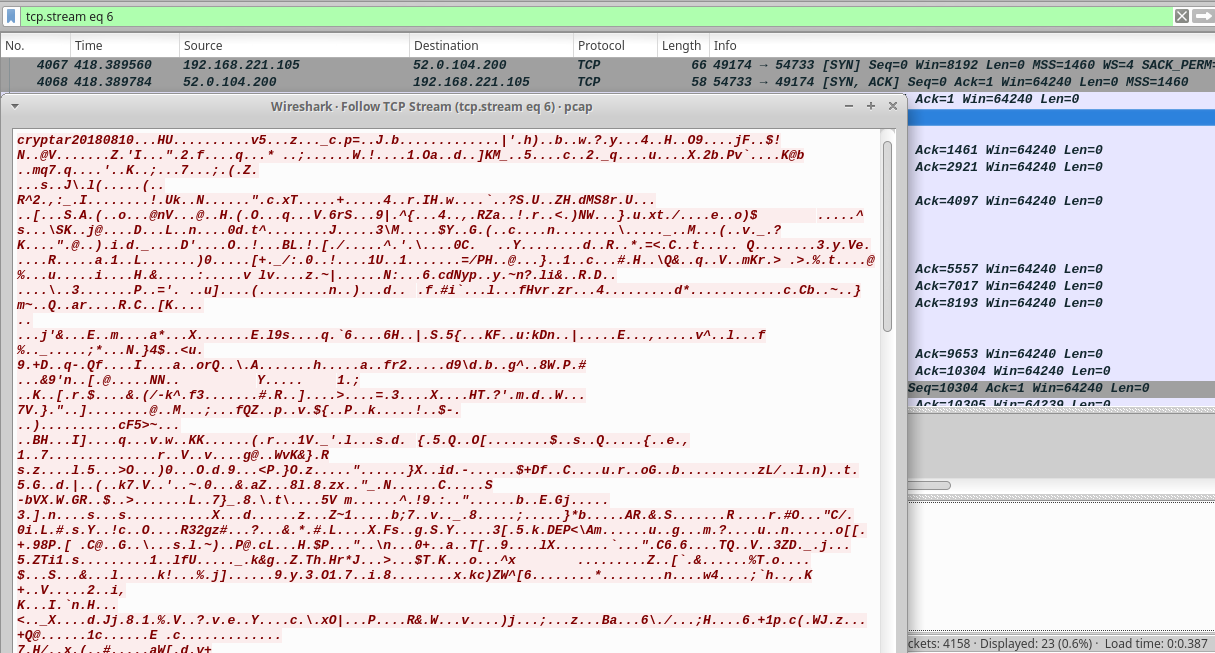
tcp stream 6
Contains the uploaded file to the ftp server, notice the header cryptar20180810 before the encrypted part.
Reverse engineering part
By using IDA we can identify the main function that is responsible for the dns query located which performs the following operations:
- Allocate memory to save the base64 encoded data of all the subdomains that are queried
- Query the TXT record of an url starting from
aaa.asdflkjsadf.notatallsuspicio.us, and save the base64 encoded data in memory
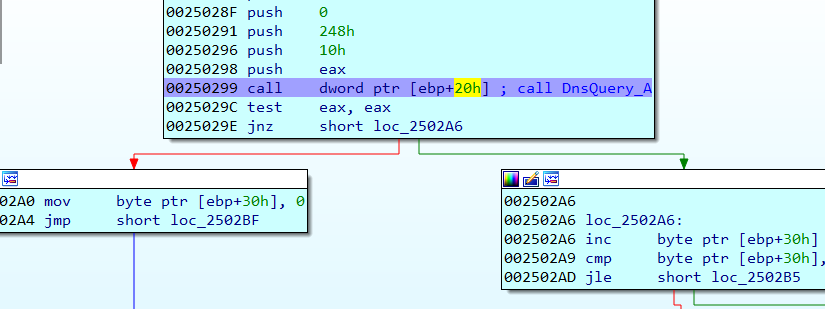
- Increment the subdomain:
aab.asdflkjsadf.notatallsuspicio.us

- Query the TXT record of that url, and concat it to the previous base64 data
Then it decrypt the base64, and jump to it.
Here we can be lazy and avoid the decryption part by replacing the base64 data from pcap into memory and replacing the base64 data from the live server, we first extract the base64 encoded data with tshark using the following command:
tshark -r pcap.pcap -Y "dns.flags == 0x8580 and dns.txt" -T fields -e dns.txt
then we can copy the data into memory using a python script inside IDA:
1
2
3
4
5
6
7
8
9
10
11
start = 0x021B0000# the address of the new allocated memory
                  # that contains the base64 encoded data

with open('base64_encoded_data', 'r') as f:
    while True:
        data = f.read(1)
        if data == '':
            break
        PatchByte(start, ord(data))# write a byte at memory pointed by "start"
        start += 1
print hex(start)
Next we have the second stage of the binary, after reversing it from top to bottom, we can see the following behaviour:
- Initiate a socket to the C&C server
- Generate a 0x30 bytes random key using CryptGenRandom
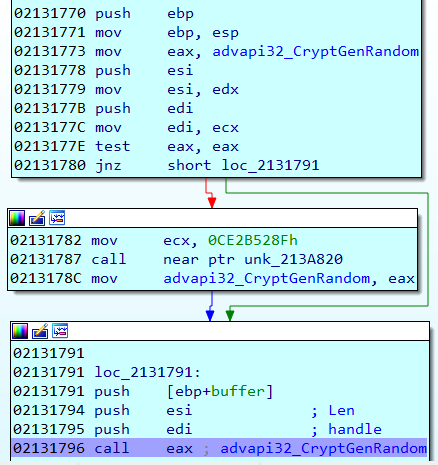
- Send the generated key to the server

- receive another 0x30 bytes key from the server
- generate a new key by xoring each byte of the 2 keys and then xoring the result with the value 0xAA
After that, the malware, awaits data from the server, decrypt it with a cryptographic algorithm using the generated key, and then decompress the decrypted data with gzip.
Let’s be a lazy reversers and use the malware as a decryptor of the pcap encrypted data !!!
We have to simulate the communication using the pcap file data, first we have to extract the packets that are interesting for us by using tshark again:
tshark -r pcap.pcap -Y "tcp.stream eq 0 && data" -T fields -e data
note: The key that is sent from the malware to the C&C server must be removed, we will inject it manually into memory, we just need to receive the key from the server, to generate the final key.
Then add an entry to hosts file and point the domain name to 127.0.0.1
The following script reads the extracted packets and send them to the connected client, the malware in our case.
1
2
3
4
5
6
7
8
9
10
11
12
13
14
15
16
17
18
19
20
21
import socket
import binascii
from pwn import *

ssock = socket.socket(socket.AF_INET, socket.SOCK_STREAM)
ssock.bind(('0.0.0.0', 9443))
ssock.listen(1)
csock = ssock.accept()[0]

log.success('connected\n')
with open('stream0_data', 'r') as pcap:
	for line in pcap:
		if line != '\n':
			line = line.strip('\n')
			pause()
			print line
			csock.send(binascii.unhexlify(line))
			log.success('data sent')

csock.close()
ssock.close()
next we breakpoint after the decompression of the gzip data, note that esi contains the address of the decrypted data.
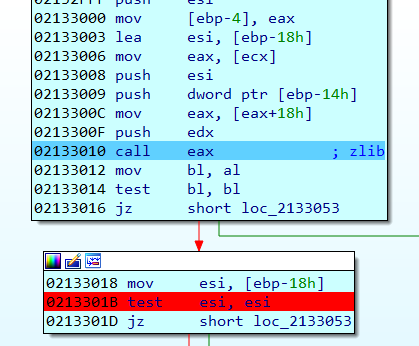
and automate the retrival of the decrypted data from memory:
1
2
3
4
5
6
7
8
9
10
11
esi = get_reg_value('esi')
data = ''
while True:
    if Dword(esi) == 0xABABABAB: # 0xAB bytes are always present after the decrypted message,
        break                    # so I used it as a break
    data += chr(Byte(esi))
    esi += 1
data = data.replace('\x00', '')
print data #print decrypted data
resume_process() #iterate the loop till the next decryption
wait_for_next_event(0, 0) #wait process until it hits the breakpoint
Now we are able to get see the pcap data in clear text for example:
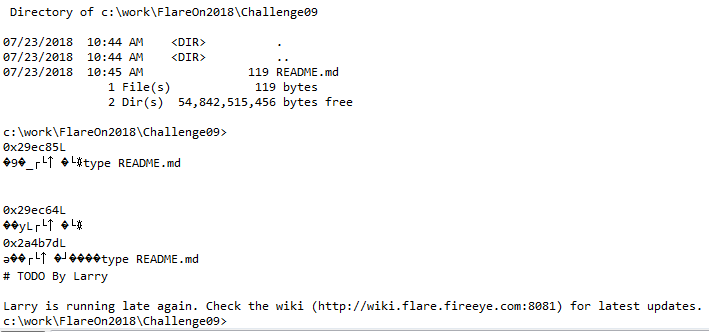
after decrypting everything, there is an http request to a special web page, so I extracted the response of it, and got the following:

let’s save that to later use, and decrypt the SMBv2 data, same principal we can extract the both keys and use them to decrypt the encrypted data.
We can see that he uses a certain binary to encrypt a zip file, interesting

After decrypting the remaining SMBv2 data, we can see the binary been transmitted, let’s extract that!
We now have a DotNet binary we can use dnspy to decompile the it and de4dot to deobsfucate it, here is the structure of the code:
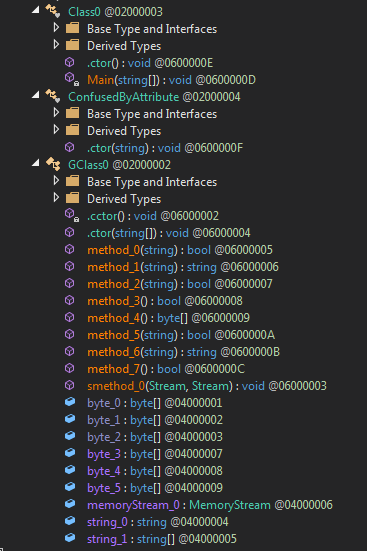
It asks for an input file and an output file as arguments first

the interesting part starts in this function:
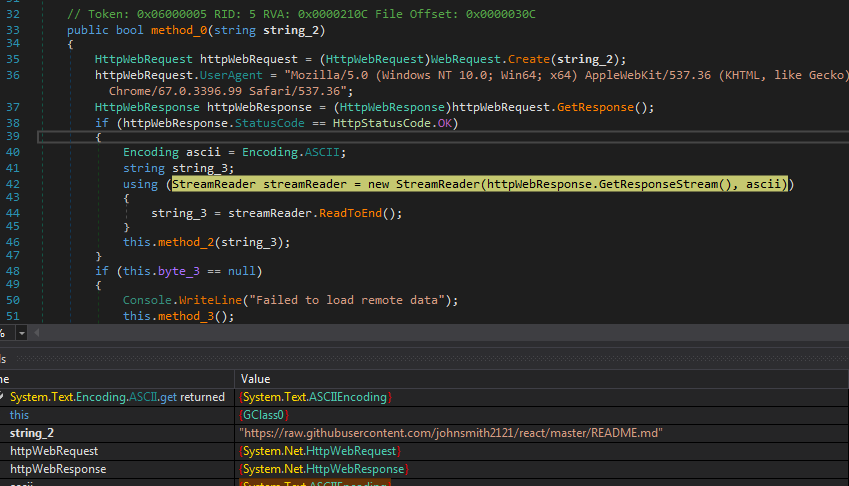
we can see see an HTTP request made to retrieve the file README.md from this url https://github.com/johnsmith2121/react/blob/master/README.md.
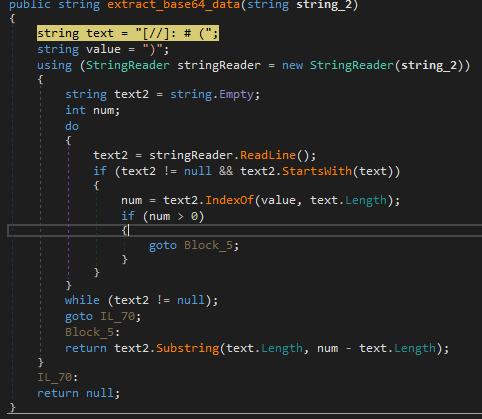
and then it extracts a certain base64 encoded string and decode it
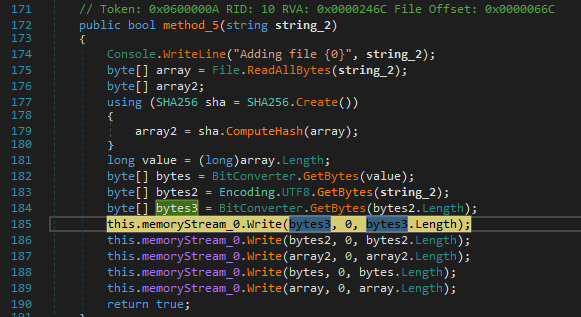
awesome, next it copies data to a memory_stream, including the hash of the input file, it’s size, and it’s content
after that, it calls a certain function to encrypt the stream with AES CBC as shown here
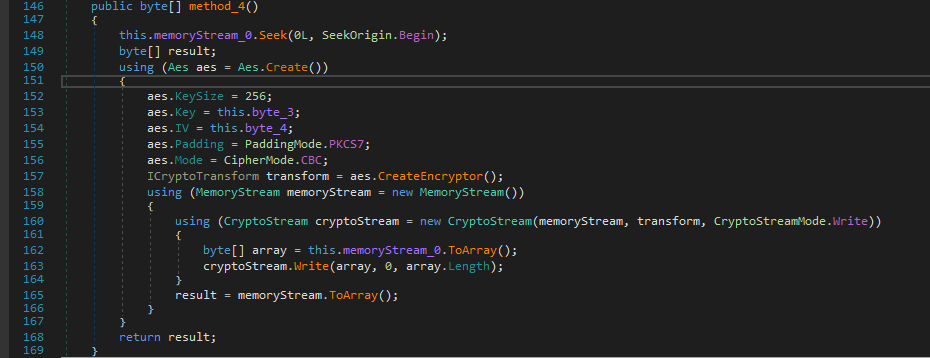
after digging a bit, we can see that the IV used is hardcoded, and the key is the previous base64 decoded data, if you remember correctly, we noticed a header in the pcap cryptar20180810 before the encrypted part, we can assume that the encryption happened in 10/08/2018, which means that an older README.md version was used, so we have to extract the old base64 encoded data and use it as the key.
For this part, I modified the binary and used it to decrypt the encrypted data from the pcap after removing the header of course, doing that we get a zip archive that asks for a password, hah let’s use the one found previously !
We get two other files,
- Another DotNet binary
- A PNG
Briefly, the goal of the binary is to hide text in a PNG, by settings its RBG to (1, 0, 0)
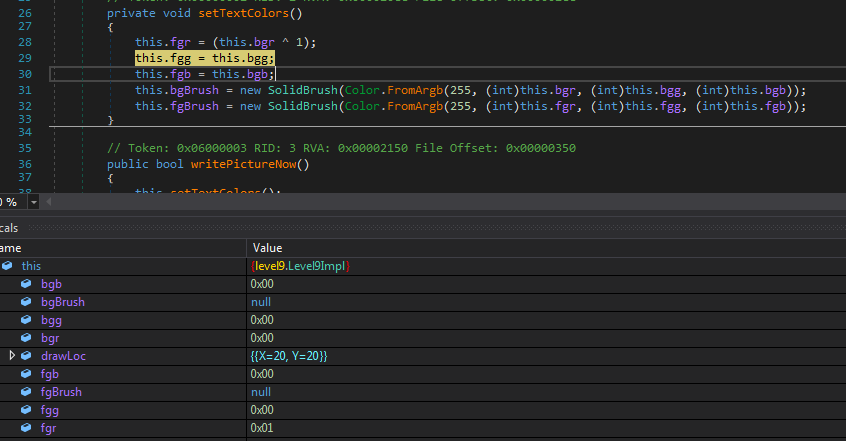
Simple script to retrieve the text in the PNG
1
2
3
4
5
6
7
8
9
10
11
from PIL import Image

im = Image.open('level9.png')
pix = im.load()
print im.size
for x in xrange(im.size[0]):
	for y in xrange(im.size[1]):
		if pix[x,y] == (255, 255, 255, 255):
			pix[x,y] = (0, 0, 0, 0)

im.save('flag.png')

If you liked my writeup, please take a look at my github repo